Pages

Showing posts with label recipe. Show all posts

Wednesday, 30 March 2011

Cheeky Beef and Guinness pies

Bord Bia are running a fabulous competition at the moment for food bloggers to win a trip to Germany to a European Bloggers workshop. In order to enter the competition I had to put together a recipe using Irish beef. Given the month that is in it, my contribution is a very Irish style pie. This pie would serve as a very hearty lunch or dinner and given the contents include meat, veg and drink it very much has "eating and drinking in it". The filling itself makes a good stew on its own (maybe dont thicken as much as I did) served with mashed potato (or even sweet potato mash).


I had far too much time on my hands so made the pastry from scratch (its not difficult, just a little time consuming) but you could just as easily buy frozen puff pastry. If you have remaining pastry then a great nibble is to scrunch up the leftover and grate some parmesan over it before sticking in the oven for 10 minutes.


Cheeky Beef and Guinness pies (makes 4)

Beef filling
  • a few tablespoons of sunflower/rapeseed oil
  • 200g finely chopped onions
  • 550g beef cheeks chopped into inch sized pieces
  • 150g diced carrots
  • 250ml Guinness
  • Salt and pepper to taste
  • 2 teaspoons tomato puree
  • 100g mushrooms
Roux 
  • 50g butter
  • 50g flour
Flaky Pastry (or use store bought puff pastry)
  • 300g flour
  • pinch of salt
  • 200g butter at room temperature
  • cold water to bind
  • a whisked egg to wash pastry

the most beautiful Irish beef cheeks

Prepare the meat and vegetables
Heat a tablespoon of oil in a small casserole. Lightly cook the onions in the oil over a medium heat until softened. Remove the onions from the casserole and set aside.
Season the beef with salt and pepper.
Brown the beef in small batches in the casserole, removing to the side once browned.
Once the meat is browned return to the casserole with 175ml of the Guinness, the chopped onions and diced carrots. Add the tomato puree and enough water to cover the meat and vegetables, along with some salt and pepper to taste.
all ready for the Guinness
Bring the stew to a boil and then leave to simmer covered on a low heat or in the oven at 150C for 2 hours.
Finely chop the mushrooms and fry in small batches in some butter until browned. Leave to one side and add to the casserole for the last half an hour of cooking

Prepare a roux by melting the 50g of butter in a saucepan and then adding the flour. Stir over a medium heat for two minutes.

Remove the casserole from the oven and strain the liquid into a saucepan. Bring the liquid to the boil and add roux, whisking to thicken. Add the remaining 75 ml of Guinness at this point also, this addition is what gives the filling its rich Guinness taste. The sauce will need to be a fairly thick gravy so that it wont leak from the pies so dont be shy with the roux. Return the sauce to the casserole and leave to cool. This bit is really worth noting. I made the filling a little too late in the day and it melted through my pastry before it was fully sealed (they didnt turn out too pretty but were still very tasty!)


Pastry (will take about 2 hours)
Sieve the flour and a pinch of salt into a bowl. Divide the butter in 4 equal pieces and mix the first piece through the flour adding enough cold water to bring together and make a pastry. Wrap the pastry in clingfilm and place in the fridge for 15-20 minutes.

be careful not to dig your nails into the pastry!
Roll the pastry into a rectangular sheet with width of about 10 inches. **Spread 1 piece of the butter across two thirds of the length of the pastry. Fold the pastry in thirds over the butter. Wrap in clingfilm and return to the fridge again for 15-20 minutes. Remove from the fridge with the seam to the side (it should look like a book). Roll to a rectangle again and repeat as before from ** 2 more times to use the remaining butter. Leave the pastry in the fridge until the beef filling has cooled.

pie ready for egg washing
Roll out the pastry so that it is large enough for 4 pies, using a side plate as a template (store bought pastry is normally also around the 500g mark so should do the same number of pies). Place the filling (2 -3 tablespoons should be enough) slightly to the south of centre.

pie with pint
I have made pies a number of times and failed at sealing them until I came across this youtube video on how to crimp the pastry. Follow the video and they will seal perfectly. Brush with eggwash and place in an oven at 180C for 25 minutes until golden brown

Fresh from the oven

Monday, 21 February 2011

Gingerbread - the perfect winter cake

I have a big admission to make, Im absolutely terrified of cup measurements. For years now I have had monthly subscriptions to US food magazines without ever making one recipe in any of them, all because of the cups! I was brought up to believe that baking was an exact science, one where everything was very carefully measured in ounces and then later grams. Cups, as a result dont make any sense to me and scare me senseless.


the prettiest cake you have ever seen?
On a recent trip to the US I bought the most fabulous Bundt cake tin and spent a week looking for the perfect cake to grace it on its maiden oven voyage. The American Bundt cake comes from the German Bundkuchen and Austrian Gugelhupf which looks fantastic but has always surprised me by its dryness. I decided that I was going to have to brave a US recipe for my new US cake tin and the first place I looked was the fabulous archives at SmittenKitchen.


This cake certainly hit the spot as a great winterly cake. Two days later its even better so as the cake has ripened and become even more sticky and chewy. Its the kind of cake that cries for a cup of strong coffee after a brisk walk in the cold, the kind of cake that will warm you all the way through with its fantastic spiciness. This is definitely not a cake for wimps, but saying that its definitely not difficult to make.


Grammercy Tavern's Gingerbread (from SmittenKitchen adapted to metric by me)
makes one bundt size tin or two loafs.


8 fl oz/220 ml Guinness
8 fl oz/220 ml Treacle (molasses on the original recipe but I couldnt find this)
1/2 teaspoon bicarbonate of soda

250g plain flour
1 1/2 teaspoons baking powder
2 tablespoons ground ginger
1 teaspoon ground cinnamon
1/4 teaspoon ground cloves
1/4 teaspoon freshly grated nutmeg
Pinch of ground cardamom (I couldnt find this - it worked perfectly without)

3 large eggs
190g dark brown sugar
220g granulated sugar
6fl oz/150ml vegetable oil
Icing sugar for dusting

Ive grouped the ingredients into the dishes you will need - which are as follows:
- One large saucepan
- Two big mixing bowls

treacle, fabulous sticky ingredient that my uncle feeds to cows when milking them
First measure your guinness and treacle and heat until boiling in your large saucepan. Remove from the heat and whisk in the bicarbonate of soda (the mixture will double in size and become quite fluffy). Leave this to cool to room temperature and then prepare everything else.
volume doubles in size when you add bicarb!
Butter the tin and dust with flour and set aside

Heat the oven to 180C/170 (fan)

Sift the flour, spices and baking powder in one large bowl

Weigh and mix the sugars in another bowl. Once your treacle mixture has cooled whisk the eggs into the sugar and then add the oil, whisking until smooth (I used a handmixer for this). Add the treacle mixture and whisk again.

Combine the flour mixture with the liquid mixture and mix until well combined.

Add caption
Pour the mixture into the Bundt pan (or small loaf tins) and give them a good knock on the counter to remove air bubbles.
the bottom does not need to look pretty!
Bake in the middle of the oven for 50 minutes, a tester should come out with just a few crumbs attached. Cool in the tin for 5 minutes and then remove to a wire rack to cool completely. This should last a good few days covered (assuming you dont eat it all very quickly!)

Sunday, 19 December 2010

Mastering the art of mince pies

Pastry has made me cry before. I have tried to overcome my difficulties with pastry (warm hands and impatience) but there are still a lot of times that I would do anything to avoid it. That being said there are a few pastries that I make that come across as so impressive that Ive become known for my pastry. This pastry for mince pies is definitely one of those favourite pastries.

Its almost effortlessly easy and no matter how much you try (believe me, I have) you cant get it wrong. This pastry will make you look like a genius and people who hate mince pies will eat them just because of this pastry.

Unbelievably easy mince pies (from BBC Goodfood) - makes about 32 mini mince pies.

- 225g cold butter (diced)
- 350g flour
- 100g sugar
- a beaten egg 

Either rub the butter and flour together or blitz in a food processor (the very very easy option), add the sugar. The dough will be very dry but you should be able to bring it together, even if only in small amounts to a shortbread like dough. 

Preheat the oven to 200C or 180 if a fan oven. 

Dont even try to roll this pastry (although my mom added some egg and said it wasnt too difficult). Take small pieces and press into each hole of the tin. I use a silicon mini muffin tin and a mojito muddler to squish the pastry to shape. Fill with some mincemeat. Shape a small ball of dough and flatten in the palms of your hands to make a lid large enough to cover the mincemeat. Press down to seal and brush them with some eggwash. 

Bake in the oven for 20 minutes. Leave to cool in the tins for 5-10 minutes before removing to a wire rack to finish cooling. 

Dust with some edible glitter or icing sugar and sit bask in your pastry geniusness.


Tuesday, 16 November 2010

Apple season - Pork and Bramley bake

Growing up in Ireland, one of the strongest memories of baking at home was helping my mother peel and cut apples for apple tarts. In fact apple tart is such a favourite speciality among friends that you could almost feel convinced into never making one for Irish people, in the knowledge that almost every person in Ireland has a favourite apple tart recipe that you could never beat. For years now Ive received apples from people at this time of year and have made all host of apple dishes but had never actually visited an orchard or picked any.

This all changed a few weeks ago when the lovely people at Bord Bia organised a trip to Stagrennan farm near Drogheda to line up with Bramley apple week. Stagrennan farm is a family orchard run by the lovely McNeece family since 1962, although with a family history in the apple business since 1890. The McNeeces grow a number of dessert apples on their farm at Stagrennan along with the Bramleys to help with cross pollination. Many of their apples are sold around the country for juice, cider making and bakery produce along as for eating. They will also shortly be bringing out their own lovely cloudy Apple juice (far superior to imported orange juice) and range of jellies.

Bramleys Seedlings have been growing in Ireland for over 3000 years and have old Brehon laws have protected them from harm over this time which has helped Ireland produce over a third of the worlds supply. Bramleys are the main apple used in cooking and baking and have quite a sharp taste when eaten (although this never stopped me as a kid when my mother was baking apple tarts). They break down to a lovely fluffy texture when baking which is great when baked as a sweet treat or even  for making a simple apple sauce. The other main benefits to the lazy cook are that they are typically quite big which comes in handy when peeling and can last quite a long time from when you buy them to when you eventually go to make something with them!

This time of year its great to have a good one pot meal to make when you get home from work and this one is as quick and tasty as they come. Its also seriously in terms of the amount non fussy and involved just one tray, a chopping board and one knife for preparation!

Pork and Bramley bake, with thanks to Bord Bia for the recipe which I have slightly modified here due to the amount of ingredients I had available to me at the time. 

Serves 2 but can be easily multiplied

  • 2 medium size potatoes (I used Kerr Pinks)
  • 1 medium sized red onion
  • 4 cloves of garlic
  • 2 tablespoons of olive oil
  • Salt and Pepper
  • 1 bramley apple
  • 400g of pork fillet chopped into inch thick slices
  • a sprig of rosemary or a handful of fresh sage leaves
  1. Preheat the oven to 200C
  2. Chop the potatoes and onion into wedges and place in a roasting dish along with the garlic. Drizzle with olive oil and season with salt and pepper. Bake for 15 minutes
  3. Meanwhile chop the apple into wedges and the pork fillet into inch thick slices. Sprinkle salt, pepper and olive oil over the meat.
  4. Place the apple wedges on top of the potatoes and onions and then the meat on top of the apple. Add the sprig of rosemary but if you are using sage leave it until 5 minutes before the end of baking
  5. Return to the oven for 20 further minutes and then serve
You can find a whole host of other apple recipes here on the Bord Bia website, including possibly the best sandwich I have ever tasted.

Thanks again to Bord Bia and Olan and Fiona McNeece for laying on such a fantastic spread of appley goodness and the tour along with Tara Walker for the great demonstration on cooking with Bramleys

Tuesday, 2 November 2010

Irish tapas - Potato cake with smoked salmon or goats cheese

After months of not being able to get a date that suited everyone I finally met up with the 3 lovely ladies that I met a year ago through a night class I was doing at the time. We had been trying to meet up for so long and all had so many things on the cards that a final decision was made that we would meet and all bring tapas, anything else for a week night was probably going to be an awful lot of hassle.

Strangely you can feel just as hassled making small things as big things so I opted for the really simple option. Id brought some lovely Knockdrinna goats cheese back from my weekend in Kilkenny and had some very swish beechwood cold smoked salmon from Inishturkbeg sitting in my fridge. When you have fantastic ingredients it seems a shame to do anything but show them off so I went for very simple potato cakes with these very simple toppings. 

Potato cakes are a crazily simple thing to make and were always made by my mom without any recipe at all. They are a great way of using up any mashed, boiled or baked potatoes you might have hanging around the house.

Potato cakes (makes 20 small canape size cakes) 
  • 300g boiled and peeled potatoes (I used lovely floury Kerr Pinks)
  • 1 dessertspoon of cream
  • Salt and pepper to taste
  • 4 dessertspoons of flour and some extra for dipping the cakes in before frying
  1. If you dont have some left over mashed or boiled potatoes waiting to be used then boil your potatoes in salted boiling water. 
  2. Remove from the water and, while still hot, peel and mash/rice with some salt and pepper.
  3. Add the cream or some milk to help mash. 
  4. Once finely mashed add the flour until the mix feels dry enough to shape, depending on your potatoes you may need more or less. What you are aiming for is for the dough to be dry enough so that it wont stick to the frying pan. 
  5. Heat a frying pan to a medium heat with a mix of oil and butter or just some oil on its own. 
  6. Roll out the dough and cut into quarters or shape small discs
  7. Dip both sides in flour seasoned with a little salt and pepper
  8. Fry for a few minutes on each side until golden brown, the frying pan should be relatively dry
  9. Remove from the frying pan and eat while still warm (fantastic with any cheese) or leave to cool.
I made 3 different versions above:
- Smoked Salmon with Creme Fraiche
- Goats cheese with Blackberry and Apple jam
- Goats cheese with walnut

Inish Turk Beg organic beechwood cold smoked salmon is part of a new range of smoked fish from Inish Turk Beg, a small island in Clew Bay, Mayo. This along with their honey roast hot smoked salmon are really something quite special. They also have smoked mackerel and Albercore tuna as part of the range. Inish Turk Beg smoked fish is currently available in Donnybrook Fair in Dublin and will be available in selected other stores throughout Ireland in the near future. Admittedly it is on the more expensive side (€9.95 for 100g) but well worth the splurge for a special occasion. Only a week after hearing Dr. Susan Steele of BIM speak about the fact that we are exporting over 86% of our fish, it was great to hear of a new company doing something fantastic with some of that fish before selling it around Ireland and exporting to foreign shores. 

Tuesday, 27 July 2010

Slow cooking - Moroccan chicken

Last week I picked up a slow cooker in Aldi (€17.99, they may still have some). After a considerable amount of wondering where on earth Id put it, I decided that smack bang in the middle of my countertop would do for now and Ill just have to use it often to argue for its place there. I figured the benefit of having dinner ready when I get home from work might outweigh the fact that in future I may have to balance it precariously on top of my books on my bookshelf.

Shiny new slow cooker at 8am before heading to work
Unfortunately once I got it I couldn't find any recipes that I was dying to try out that weren't on US sites and I was definitely far too lazy for proper conversion and measuring. As a result here is a very made up attempt at Moroccan chicken, which was very very tasty.

The four things I read about the slow cooker were completely ignored so Ill give them to you before I get to the recipe.
  1. You don't need very much liquid in slow cooking as it really wont evaporate (you will see later that I used far too much liquid so my recipe has about 1/4 the water that I used)
  2. 3 hours in an oven = 8-9 hours at low heat in slow cooker (perfect working hours)
  3. Its almost impossible to burn your dinner in a slow cooker if its on low - this is good to remember half way through the day when you get a little worried about those lovely lamb shanks you bought
  4. Root veg takes as long to cook as meat, in my case below the courgette were definitely a bit overcooked.


(possibly) Moroccan chicken - for two
Possibly only because its way tastier than anything I had to eat when I visited Morocco

I was told it never burns - this is caramelising

  • 2 Chicken legs and thighs chopped into strips
  • 1 onion chopped into 8 chunks (halve, then quarter the halves)
  • Half a courgette chopped into inch sized chunks
  • 1 sweet red pepper chopped into inch sized chunks
  • 4 chopped tomatoes
  • 1 grated clove of garlic
  • 1 dessert spoon of sugar
  • 1 teaspoon of ground coriander
  • 1 teaspoon of ground cumin
  • 1/2 teaspoon of cinnamon
  • 1/4 teaspoon of cayenne pepper
  • 1 teaspoon of turmeric
  • 1 teaspoon of salt
  • Juice of 1/2 a lemon
  • a handful of raisins and some dried apricots if you have them
  • 50 ml of chicken stock (homemade if possible)
Ok, I know this seems like a million ingredients but if you chop them all up and put them into a bowl the night before then you only have to bung them in the slow cooker (on low heat) in the morning and when you come home from work you have a tasty dinner.I served this with some couscous but it would be equally good with rice, Bulgar or quinoa.

very hot Moroccan chicken
It made a lovely dinner but I still don't know where I'm going to put it. If anyone has any good slow cooker recipes Id very grateful, it might help get to convince the workman to build me a new shelf!

Thursday, 22 July 2010

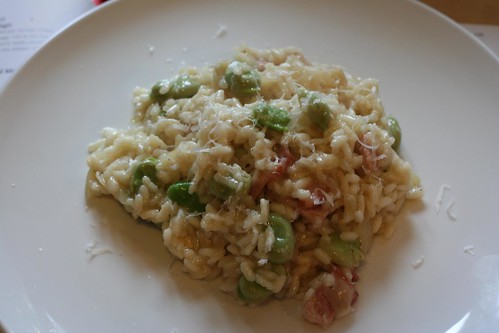
Broad bean and bacon risotto


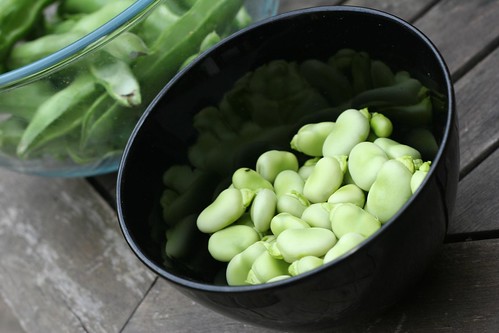
I was always shocked at the price of broad beans until I tried growing them. They are actually quite easy to grow but you really need a whole lot of space to grow enough for even one dinner. Its a pity really as they are so fantastic and even more so when you can pick them and eat them straight away.

Id definitely recommend trying to grow broad beans if you have some space in your garden. I planted them a little too early but they still seemed to survive the frost and pop through, weeks after I was expecting them to come up.

If I had been able to give up enough of my garden I would have made a big bowl of Habas con Jamon (beans with bacon) as I used to get in tapas bars when in Granada last year but its surprising how much space is needed to grow broad beans. Broad bean and bacon risotto was the next best option. 

If you haven't made risotto before its really not as scary as people say, just make sure you have enough stock simmering and that you don't let the rice go dry while cooking. 

Broad bean and bacon risotto (serves 2, one of whom has a giant appetite)

- about 200g of single podded broad beans (double pod if you are less lazy)
- 2 rashers
- 750mls of veg stock
- one glass of white wine
- a finely chopped onion
- 1 finely chopped clove of garlic
- 25g of butter
- 200g risotto (arborio) rice
- 30g parmesan


Bring the stock  to the boil and then add the broad beans and boil for a few minutes until tender. Remove the beans and leave the stock to simmer. Its way easier to remove the second little pod at this stage if you want to leave you with fantastically Kermit the frog coloured beans

Heat the butter on a medium heat and add the onions and chopped bacon and fry until soft but not yet coloured, something like the picture below.


Add the rice and stir for about a minute until the rice is starting to go slightly clear at the edges. 

Throw in the glass of wine and let it bubble away until the wine is almost soaked up. 

Then add your first ladle of stock. Again, stir a little and let it bubble until almost evaporated. Continue to do this until the rice has softened enough and stopped drinking up the stock as quickly. This should take about 20 minutes and the rice should still have a bit of a bite to it. Add the beans before you add the last of the stock to heat them through. 

Take the rice off the heat and add the parmesan and pepper, it shouldn't really need any salt but add if you think it does. Serve as quickly as you can!


Monday, 28 June 2010

Free booze - Elderflower Champagne


Well ok not completely free but it is freeish, as long as you dont mind a bit of a wait. Given that you probably still have elderflowers somewhere near you I recommend you get out and pick them now and youll have your freeish booze in 2 weeks!

I saw the first elderflowers in bloom two weeks ago and was so excited that I immediately grabbed some and brought them home. Then they sat in my kitchen for 2 days and promptly went quite smelly. The secret to elderflower cordial or champagne is fresh, just off the tree, in bloom elderflower. I have read that they freeze well so if you see some and dont think that you can do this today then that might be an idea. If you dont live in the country you're still ok, you can find these almost everywhere on the sides of roads, in parks and loads of other places but youre probably better off looking for slightly less polluted ones than half way along the m50. Also dont blame me if you get into trouble for picking them, much as the booze was my idea the idea to steal them from your next door neighbours back garden was not*.

Ive seen a lot of different recipes for Elderflower champagne but went for the first I found on google by the fantastic Hugh Fearnley-Whittingstall which is available here.

What you will need (for 6 litres - I doubled this)
  • a big clean bucket/storage bin/saucepan (to hold at least 7 litres)
  • Water 4 litres hot, 2 litres cold
  • 700g sugar
  • 4 lemons (zest and juice)
  • 15 heads of elderflower
  • 2 tablespoons of white wine vinegar
  • a pinch of dried yeast (although you wont need this for a few days)
  • Muslin for covering and sieving through
  • Good strong bottles, I used these Slom bottles from ikea

  1. Get your big container and clean it. 
  2. Run out and get those elderflowers. You really only need the bloom itself and a little bit of the stalk its attached to (dont bother with leaves)
  3. Pour the hot water into your container and then mix in the sugar until dissolved.
  4. Add the cold water, wine vinegar, lemon zest, lemon juice and elderflower. Stir a little bit
  5. Cover with muslin and leave to ferment somewhere cool
  6. After 3-4 days check to see if there are any bubbles/froth or any sign of fermentation. If not add your pinch of yeast. Mine didnt froth until adding the yeast but after that it sounded a little like rice krispies in milk.
  7. Leave again for 4 days until the bubbling subsides, apparently there are ways of telling when its ready  using all sorts of gadgets but I did this on the cheap and just waited the 4 days and was happy that the bubbling had stopped a bit. It also tasted far less sweet than it did a few days before which was a good sign - less sweetness = more alcohol. It looked just like this (which looks like it would smell awful but really was quite lovely smelling)
  8. Grab a colander and line with muslin and put it over a large pot. Pour the mixture through the muslin.
  9. Pour into your glass bottles and seal. 
  10. Leave bottles somewhere cool for a week before opening and drinking. Apparently its not uncommon for bottles to pop under the pressure so I would recommend leaving them in the bucket you used for fermenting just in case!


I havent tasted the finished product just yet but wanted to put this up to inspire some people to get out and pick elderflower while they still can. I'll post a quick update on Sunday! Remember kids, always drink responsibly. 


* mine were stolen by putting my hand through the fence of my local primary school, the caretaker who passed by as my co-conspirator and I were there with scissors didnt say a word.

Tuesday, 18 May 2010

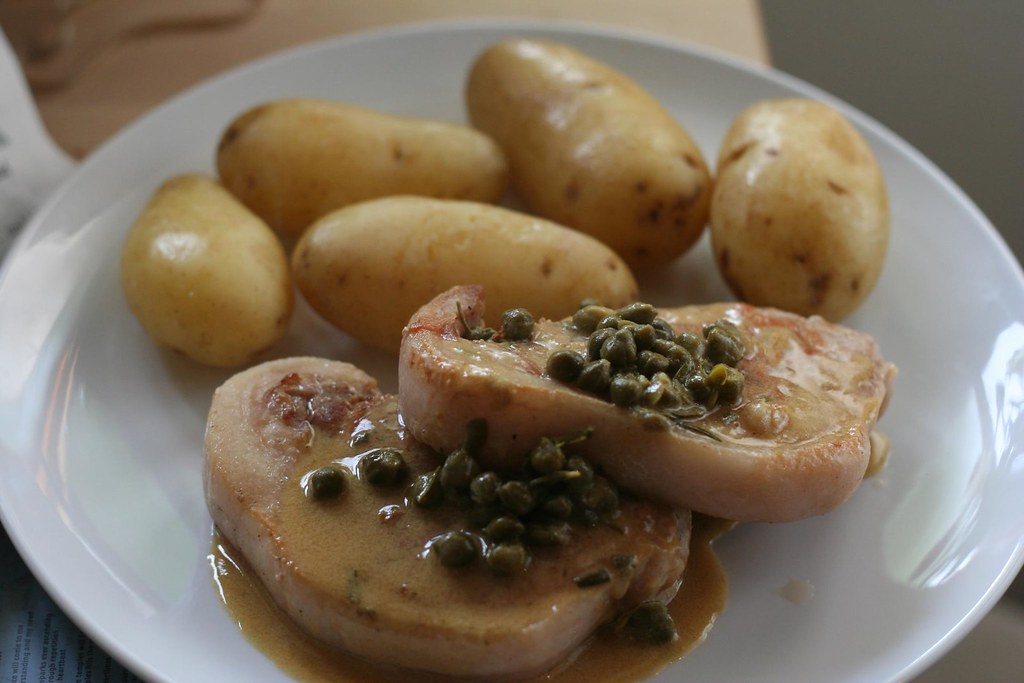
Pork chops with caper and mustard sauce

Im sure if youre not a lazy blogger this job comes with some perks, but being a lazy one its always a bit of a nice surprise if someone even comments. When I got an email a few weeks back from the lovely Donal saying that the lovely BordBia people wanted to invite me to an event I was fairly shocked, when they then told me that they wanted to send  me some pork I was delighted. Free food to a foodie, what more could you ask for? The least I could do was to post my findings (and hope they might send more food my way!)


To be honest though, I dont really buy much pork other than in rasher or chorizo form. There is almost always rashers and chorizo in my fridge, so handy and tasty and fantastic for a quick dinner after work (which reminds me of about 6 recipes I should post).


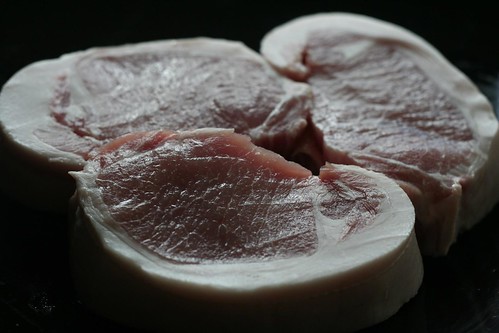
So when I got a big lump of loin of pork I had to have a good think about what to make. I hadnt made this recipe in a good while so it was the first to come to mind. Its a version of something a friend gave me from a course she was on somewhere once and it doesnt sound like it would be as fantastic as it is, its also quick and tasty and doesnt require any very silly ingredients that you wouldnt find in most shops. In fact this is the perfect thing to eat in the middle of the week when you want something fantastically tasty but dont have the time to think and dont want to call for a takeaway.

Pork chops with caper and mustard sauce
serves 2

  • 3-4 thick loin pork chops. My butcher will cut me ones almost an inch thick.
  • 250ml stock, chicken is probably the best but works equally well with veg stock
  • 1 tablespoon capers, drained from a jar
  • 1 good sprig of rosemary, finely chopped (optional but good if you have it)
  • 1 tablespoon dijon mustard
  • 2 tablespoons butter
In a large frying pan, heat some olive oil. Season the chops with some salt and pepper and cook in the frying pan for 4-5 minutes on each side until well browned. Remove from the pan to a plate and keep covered to let them rest. 

Drain your frying pan a bit. Add stock, capers and rosemary to the pan and reduce to about half. Return the chops to the pan and simmer for a few minutes until youre happy that they should be cooked through. Remove the chops again. 


Whisk the mustard and butter into the sauce. Check to see if you need to add some extra salt and pepper. Pour the sauce over the chops and eat. This is really good with some boiled potatoes and broccoli.


Thursday, 28 January 2010

Plane food

Last night I went to see the film Up in the Air and it reminded me of all the awful things about spending a lot of your time on planes for work. One of the worst things always is the food and when you are stuck on long flight bored senseless its really the only thing you look forward to (especially if you fly with Virgin, although unlike the writer of this complaint Ive always found their food the best of a bad lot)

Im off to New York at the weekend and it looks like the airline only serves food at a cost and there is no way on earth Im paying for plane food. As a result all week Ive been trying to think of a few things to bring onboard (that wont be stopped by security), that I could make on a busy work night. After scanning through my bookmarked recipes I came across Carolines Leek and Cashel Blue Crustless quiche. With a little bit of modification (for the leftovers in my fridge) I made the following:

Ham and mushroom crustless quiche
  • 4 rashers
  • 200g mushrooms
  • 50 cheddar cheese
  • 3 eggs
  • Milk - 300mls
  • Cream - 75mls 
  • Self raising flour - 125g 
  • Salt, pepper
A 9.5 inch/24 cm frying pan or quiche tin.
Heat the oven to 190C/180 Fan

Cut the rashers into small pieces and fry up on a highish heat until crispy. Chop the mushrooms up and fry in batches on a high heat.


Whisk the eggs, cheese, milk and cream together. Add the rashers, mushrooms, self raising flour and season well (if youre not sure then fry a little bit to taste). Pour straight into the hot quiche dish/frying pan and cook for 35-40 minutes until brown, well risen and firm to the touch.

Im also bringing some homemade Fougasse and going to pop over to the lovely chicken man from Poulet Bonne Femme tomorrow to get myself a chicken to bring on board. If you hear of a lady being arrested at Dublin airport for not surrendering her chicken at the weekend, that will be me. 

Thursday, 2 April 2009

Birthday chocolate cupcakes - Easy peasy parties


I came across these cupcakes in Easy Food a while back and have made them a few times since. Providing you have all the ingredients to hand they couldnt be simpler. The first time I made them was for a 21st where they had to be hidden in a press so the birthday girl could get one as they were eaten so fast. Since then I decided that making them as mini-muffins would be better and made them for my birthday. All 45 or so were iced with 30's and hearts (by a kind icing friend who realised it would be wrong for me to make and ice my own birthday cakes).

The good thing about mini muffins is that people dont feel near as guilty about eating them - at my birthday party they were gone before I had a chance to grab one.

I had cause again to make them this week for my dancing class friends as it was my last class before finishing up to go to Ballymaloe and theres a fairly good chance I will bring them out again for my last day at work in a few weeks time.

Chocolate mini muffins (makes 45ish)
  • 100g chocolate chips (I went for 40% cocoa content)
  • 200g self-raising flour
  • 200g light muscavado sugar
  • 6 tablespoons cocoa
  • 150ml sunflower oil
  • 100ml sour cream
  • 100ml water
  • 2 eggs
  • 1 teaspoon vanilla extract

Icing

  • 120g chocolate
  • 100ml sour cream
  • 1 tablespoon light muscavado sugar

This couldnt be easier - put all the muffin ingredients apart from the chocolate chips in a big bowl and whisk until smooth. Stir in the chocolate chips and divide between the mini muffin cases (best to oil these with some oil spray or sunflower oil first).


Place in an oven pre-heated to 180c for 15 minutes. Take out and cool before icing


To make the icing heat the chocolate, sour cream and sugar slowly in a saucepan until melted. Chill until firm enough to put on the mini muffins.

Wednesday, 1 April 2009

Hummus - Easy peasy parties

Some of my friends avoid garlicy things like the plague whereas others go straight for it. This hummus is definitely a recipe for garlic lovers but goes equally well on a bit of baguette at a party as on a pita bread with some cucumber and tomato like I have been having for my supper recently.

Again this could not be simpler if you have a food processor and only takes a few minutes (most of which will be looking for your tin opener)


Hummus
  • 400g can of chickpeas (this works out at about 270g drained) - you could of course steep and boil chickpeas but I was going for fast and tinned chickpeas were 2 for €2 in the supermarket

  • 3 garlic cloves chopped finely

  • 3 tablespoons tahini paste (finding this in the supermarket can be the most difficult bit)

  • 4 tablespoons olive oil

  • salt and pepper to taste

  • juice of one lemon

  • chill flakes (optional)

Bung the chickpeas, garlic and tahini and blend until smoothish, not too smooth or you will lose all the texture. Add the lemon juice and oil and whizz some more. Taste and add salt and pepper to taste.


Eat with pita bread, baguette or along with some foccacia (only if youre not planning on kissing someone)

Tuesday, 31 March 2009

Guacamole - Easy peasy parties

When I bought my wee little house I was determined to have a summer house warming and a massive barbeque, unfortunately after agreeing to purchase in May it was almost Christmas by the time I got the keys and far too cold for al fresco dining. My house is also far too small for more than a handful to dine inside.

It took me over 6 months to get my act together and organise the house warming perfectly in time for summer. Ive since had a repeat bbq and when it came to celebrating my 30th I decided that despite the fact it was mid March I would do the same.

Over the next few posts Im going too let you in on a few quick recipes that can help you look like a fab host/genius starting with one of my favourite recipes handed to me by one of my old work colleagues who attended that first housewarming - Neal.

Guacamole

  • 4 soft avocadoes
  • 1 lime
  • 100ml sour cream
  • salt
  • pepper
  • 1 deseeded red chilli (optional)

This is so easy its almost a joke to put it up as a recipe but so many people dont have a notion what to do with avocadoes (much like myself a few years ago) and the stuff you get in jars is so awful (unlike some of the really tasty salsa you can get - Id definitely cheat on this one).

Halve and pit your avocadoes, scoop out the flesh and put in a big bowl or food processor. Squeeze in the lime juice, add the salt, pepper, sour cream and chilli. Whizz in the food processor or mash with a masher. Easy peasy. Just dont do it too far ahead of time as if its sat out for too long it loses its lovely green colour

Wednesday, 18 February 2009

Flashback recipe - Baked Alaska

I think my Mom made Baked Alaska once when I was a kid and I was completely in awe of its apparent scientific miraculousness. Hot and cold, spongy and chewy at the same time - it seemed like it couldnt actually be physically possible.

My mom never made it again, probably because its a bit of a pain in the ass keeping 4 kids away from meringue and ice-cream for long enough for it to work. Its not really that much of a pain to make though and makes you feel like you are right back in the 80s (which is so terribly apt currently).
Theres quite a few bits to this but you can cheat a bit and it doesnt take too long to make at all. You have to eat it straight away once you have it made though, which if you have any sweet tooth should be no problem for you whatsoever.


Ingredients - Baked Alaska (taken from Odlums)

Sponge Base:
  • 2 eggs
  • 2 egg yolks
  • 2oz Caster Sugar
  • 2oz self raising flour
  • pinch of salt

Filling:

  • Ice Cream (I used about half a Haagen Daazs tub)
  • Fruit (optional - I used 2 good handfulls of rasberries)

Meringue Topping

  • 2 egg whites
  • 3oz caster sugar

Preheat the oven to 200C. Grease a sandwich tin or a bread tin as I did.

Beat the eggs, sugar, salt and leftover egg yolks until thick and creamy. Sieve and fold in the flour using a metal spoon.

Bake for about 10 minutes until well risen and brown. Cool on a wire tray.

At this stage I recommend letting your ice cream soften a bit and then spoon it into the shape that you want for your Baked Alaska (or baby alaskas like mine). Put the ice-cream back into the freezer on a plate in the shape that you want.

Make the meringue by beating your egg whites and caster sugar until thick enough that you could turn the bowl upside down without them falling out.

Once the sponge is cooled place it on an ovenproof dish and put your fruit and then ice-cream on top. Plaster your meringue all over the ice-cream making sure to cover it completely down as far as the sponge. You can be as messy as you want at this stage and still get away with calling it a masterpiece when you finish.

Place in the oven for 3-4 minutes until golden brown. Eat very quickly preferably with some Abba playing in the background.


Friday, 13 February 2009

Much better than roses for Valentines day - Baileys Chocolate Fondants

Im not a crazy Valentines day person, Im all about being nice to your loved one all the time. Id much rather sit in and make dinner together than go somewhere overly fancy for an overpriced Valentines Day special and Id much rather get this after my dinner than a bunch of roses (snowdrops are my flowers of choice)

There are a million versions of this recipe everywhere, probably because its dead easy to make and will get you loving from any chocolate lover out there. This version is a version I bastardised with Baileys from Gordon Ramsay.

Baileys Chocolate Fondants
Ingredients:
50g unsalted butter
Cocoa powder
50g dark chocolate (minimum 70%)
1 egg
1 eggg yolk
60g caster sugar
50g plain flour
2 good tablespoons of Baileys (optional)

Preheat the oven to 160C. Butter 2 large ramekins or 4 small ones if youre not so greedy and dust with cocoa powder.

Melt the chocolate and butter in a bowl set over a pan of water and leave to cool as you get the rest of the ingredients ready

Whisk the egg, egg yolk and sugar together until pale and thick. Mix in the slightly cooled chocolate mixture and the Baileys.

Sift the flour over the mixture and gently fold in using a large metal spoon. Divide and bake for 12-14 minutes until the top is firm but you can tell that the middle is still soft.

Turn out into two bowls, eat (along with some baileys ice-cream if you have it) and fall into a lovely sugar coma.

The photos of this when cooked may be considered food porn so Ill just let you imagine!

Wednesday, 28 January 2009

New York Choc chip cookies

When I was in New York one of the many places I was dying to visit was Baked especially after reading about how they were both working in high profile jobs before leaving to setup a bakery. As I only had a few days in the city and it wasnt the easiest place to get to I never made it but I did get to a bookshop and found their cookbook which I have been dying to make something from since coming back early in December.

Everything was a bit crazy before Christmas in the food.ie household with the impending trip to India, unpacking from New York and all the usual Christmas festivities so I didnt get around to making anything from the book until this weekend. Where better to start than some chocolate chip cookies?

This is a slightly modified version of theirs being that I didnt have all the ingredients in the house but yummy all the same.
New York Chocolate Chip Cookies
  • 280g plain flour
  • 1 teaspoon salt
  • 1 teaspoon bicarbonate of soda
  • 180g butter
  • 165g soft light brown sugar
  • 100g white sugar
  • 2 eggs
  • 2 teaspoons vanilla extract
  • 200g chocolate chip cookies - I used milk chocolate but think I will try with dark chocolate ones next time.

Measure the flour, salt and bicarbonate of soda and place together in a bowl

In a mixer with paddle attachment beat the butter and eggs together until smooth and creamy. Add the eggs one at a time until fully combined. Add the vanilla extract and beat for a few seconds

Add half the flour and beat for 15 seconds. Add the remaining and beat until just combined

Fold in the chocolate chips. Cover the bowl and put in the refrigerator for as long as you can, overnight ideally. You can leave it just an hour or two but it will be harder to form the cookies.

Scoop the dough out into 2-tablespoon size balls and shape into perfect balls with your hands. Place on linked baking sheets about 1 inch apart. Bake for 12-14 minute at 200C until the edges are goloden brown and the tops starting to get dark. Remove and cool for a few minutes or do like I did and eat straight away!

Along with a big glass of milk, theres no better way to round off a lovely weekend.